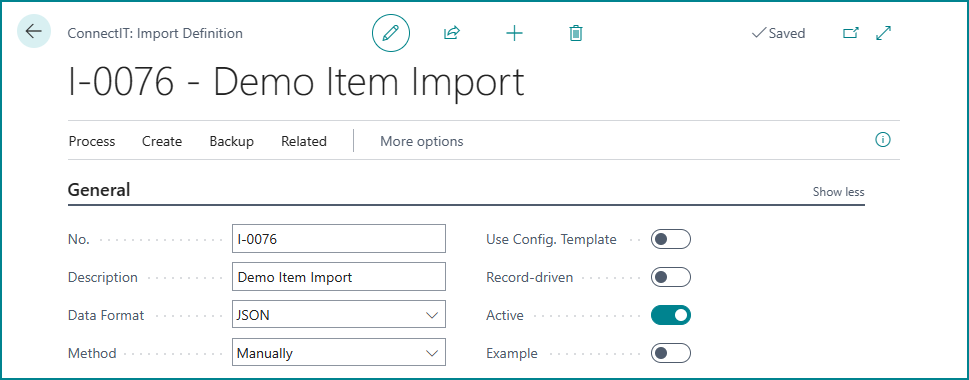
On the General tab, give the definition a recognizable description. Select the data format of the incoming data and select the method that will be used.
Supported data formats currently are JSON, XML, CSV and Excel. Currently supported import methods are Manually, FTP, REST, Azure Storage, Azure Service Bus and Dropbox.
Provide the file name(s) or file extension(s).
It is possible to use configuration templates during import. For more information on how to set this up, see the Configuration Templates section.
Before, after and/or during importing a record, tasks can be executed. For more information on pre- and post processing tasks, see the Tasks section.
JSON/XML Definition Lines
To create definition lines, in the ribbon of the import definition, click Create Import Definition. Select a file that contains the data as how it will be received.
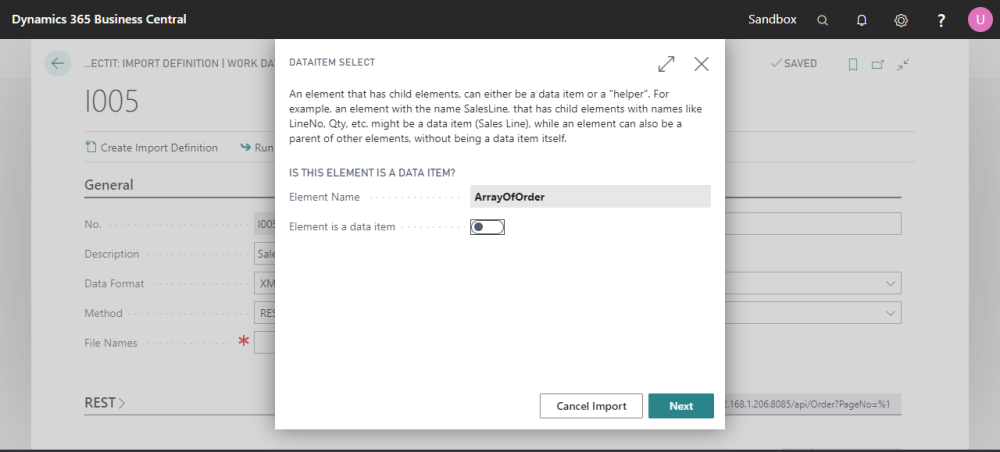
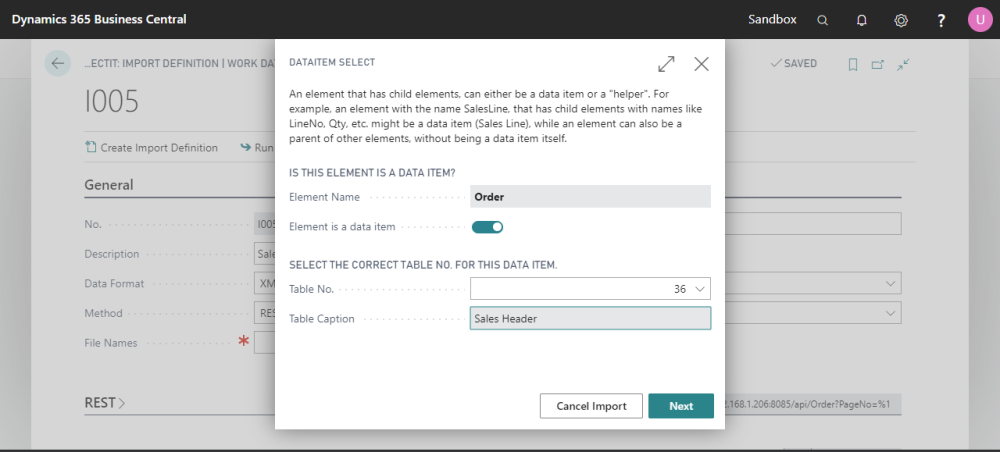
A wizard pops up, asking you to select if the element is a data item or not, for each element that has child elements.
The below image shows a simple XML definition. On root level there is the element ‘ArrayOfOrder’, which is a helper element.
One level deeper, there is the ‘Order’ element. This element is a data item, in this case the ‘Sales Header’.
Beneath this level, we find the element ‘Lines’, which again is a helper element.
Another level deeper there is the ‘Line’ element, which is a data item, in this case the ‘Sales Line’.
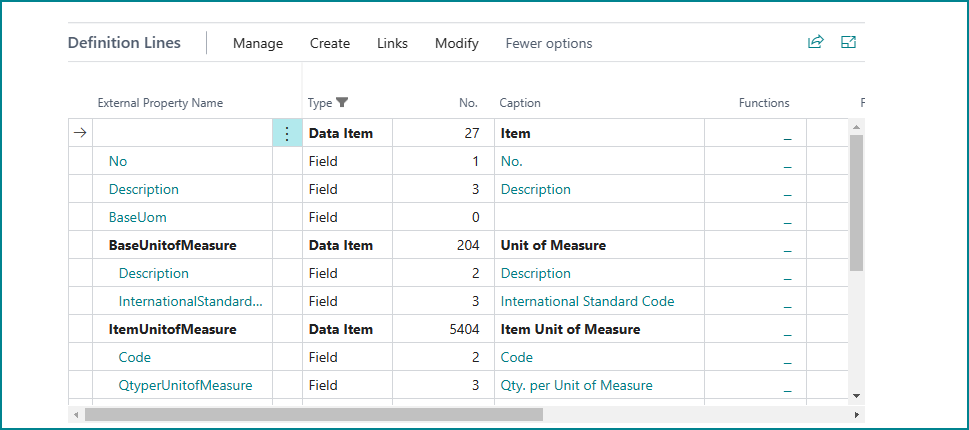
Fields and attributes will be mapped automatically is this is allowed (see Setup).
Always check if automatically mapped fields were mapped correctly. Add mapping for fields and attributes that weren’t mapped yet.
It is allowed to leave fields unmapped. In that case, those values won’t be written to a field. Their values can still be used through Functions though.
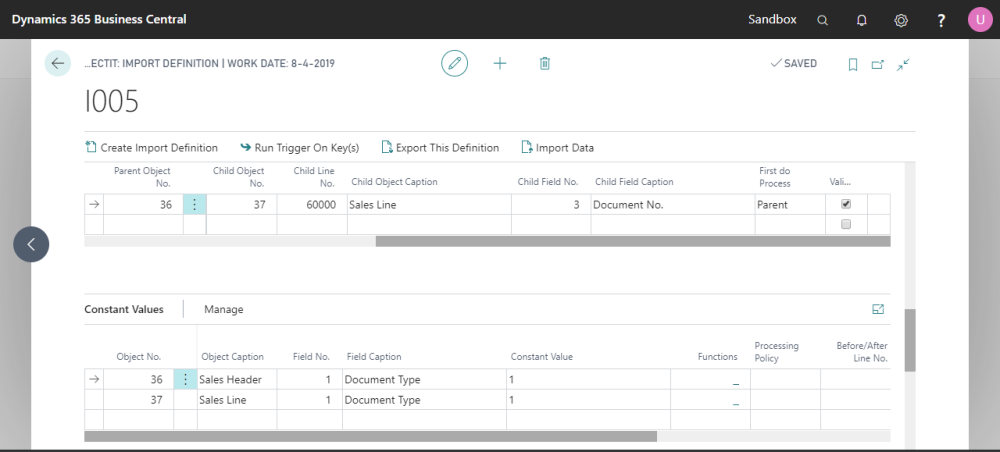
Finish the import definition by adding key links and constants. Key links are used to connect data items to each other. Like in this example, the order no. of the header, is part of the primary key of the lines.
Document type is part of the primary key for both the header and lines, but is not part of the incoming data. So two constant lines are added to provide this information.
In more complex situations, (key) link lines can also be used to connect non-related data items to each other, for example the customer no. of in the sales header.
Also, additional constant lines can be added. Constant lines for key fields are always processed together with the rest of the primary key, while for all other fields a processing policy has to be selected.
You may choose from processing right after the key or after or before a certain field. In the latter case you will have to select before or after which field.
For all fields it is possible to decide if the field should be validated and if the code on the run trigger should be executed.
To set the Run Trigger boolean for a key field, you will need to use the * Run Trigger On Key(s)* button from the ribbon. For all other fields you can just click the box.
Finaly, you may want to be able to recognize records based on an external identifier. For example, in a customer import, you receive data from an external party, and the customer no. in their database is different from the customer no. in your database. In that case you can check the External Identifier box for the element that represents the external customer no. value. After import, BC will be able to identify your customer record by the customer no. value of the external party.
To start using the definition, set it to active in the general tab.
For more information on Recurrence, see the Task Scheduler section.
For more information on Alerts, see the Failure Alerts section.
